
Screen doors & panel planes

It
all started with this - the ‘error’ that is. The above photo is a test
piece of the frame for the storm window. Looks harmless I know - but it represents a very
early mistake I made which continued to bite me in the posterior over
and over again as this project wore on.
I
had purchased some really nice 8/4 quarter sawn white oak about a year
ago. They were all 12' long and were all from the same tree - perfect
for a project like this. I needed 1-9/16"thick material as dictated by
the existing door frame... seemed like an awful waste to
remove so much material. I also wanted to add thermal glass panels to
the side storms and the 3 above the door - we lose a fair amount of
heat through the original single panes so a thermal unit seemed like the right
idea. The company that was making them reccommeded a 5/8" thick unit at a
minimum - 1/8" tempered glass on each side and Argon between. In what
felt like a stroke of genius at the time, I figured I could reduce the
amount of waste in the stock if I integrated the molding which would
allow me to increase the overall height giving me a bit more room for
the thermal pane. I made the test piece and was feeling pretty proud of
myself - saved a bit of wood from the cyclone and eliminated the step of
having to apply (and make) a separate molding.
In the words of Lucas - epic blunder.
This
early decision created so much additional work - it is embarrassing. I
underestimated the additional time fitting each mitred corner compounded
by the fact that the tenons were not the same thickness as the rebates
and dados for the thermal panes.
There
are 2 frames that fit into the screen door - one that holds screen and
the other that will hold the thermal glass. These 2 frames are removable
- which is nice... but it meant a pile more additional work cutting all
the mitres - and white oak is not known for its ‘squish factor’.

I
also decided to use Ebony drawbore pegs for the screen door. The tenons
are live tenons and are about 3" long so there was lots of room for
pegs. There are 2 different sizes of pegs for the screen door - 3/8" and
1/4" square - and of course I had to arrange them in a way that each
one was in a unique position. I used a single 1/4" square peg for the side and upper storms.
(the Ebony peg layout)

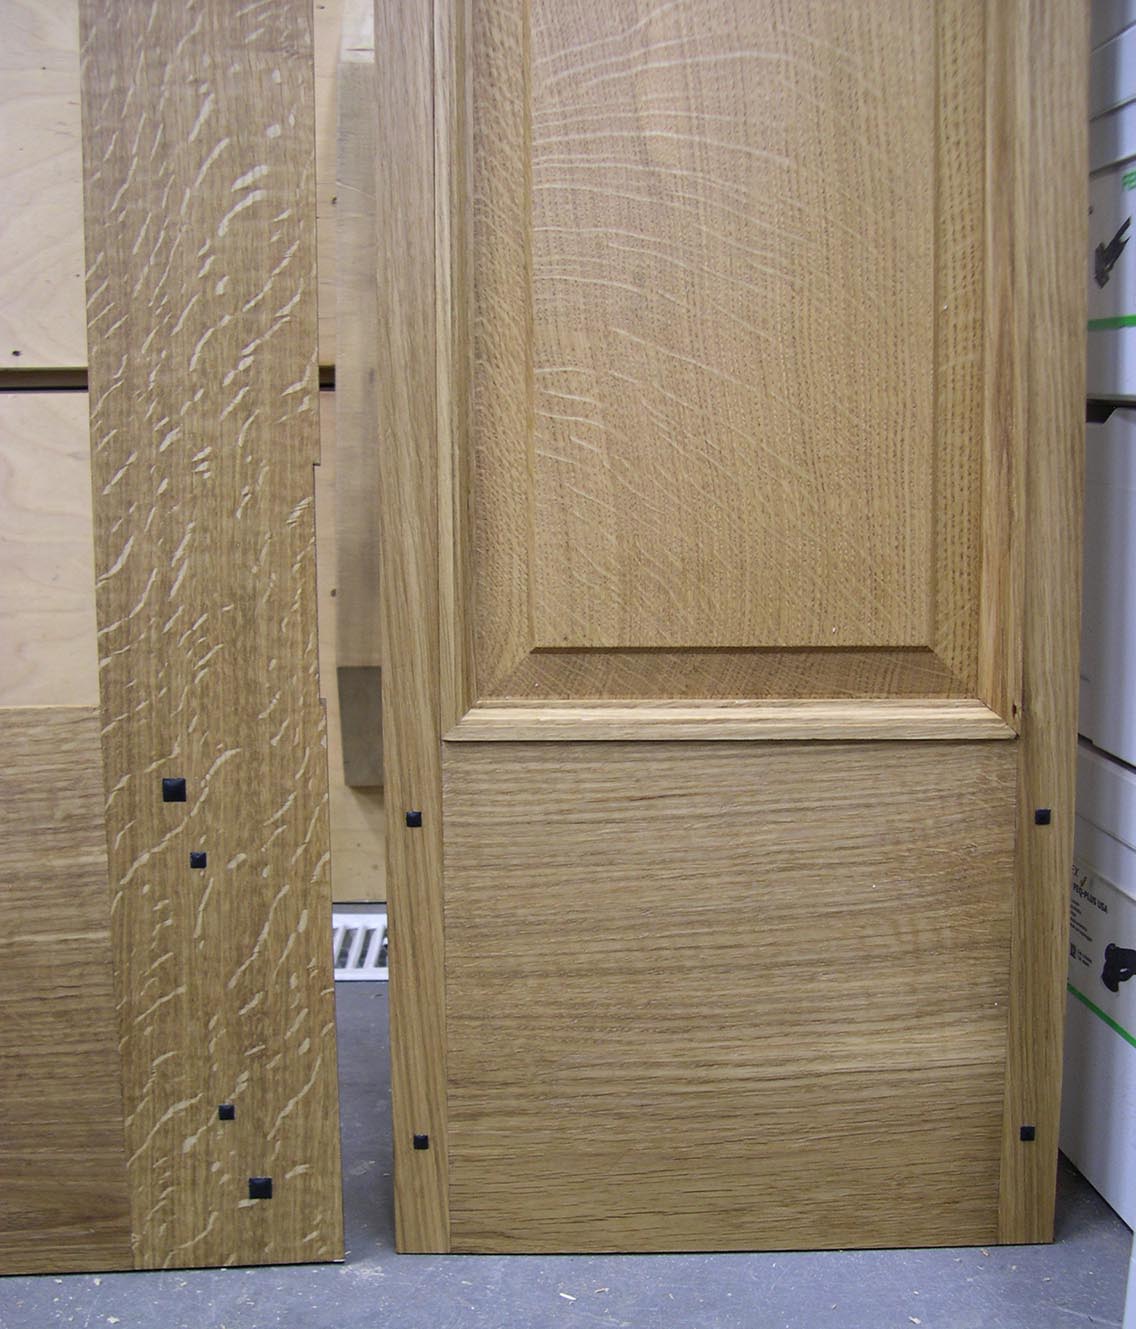
Here
is a shot of the edge of one of the side storms. You can see the twin
tenons for the center rail and the gaps to allow for expansion and
contraction.
The pegs were all left 1/16" proud of the surface. I taped everything off and used a chisel and then a padded piece of sandpaper to dome them over.

(testing the layout for the raised panels)

The
raised panel for the side storms is a little unconventional - the
shoulder is not perpendicular to the field - it is angled to match the molding. I ended up
cutting a square shoulder and used a shoulder plane to make the angle.


(the fully assembled side storm ready for finish)

Here
are a few shots of the storms and screen door in place. I am still
waiting for the glass units to be completed and I will make the screen
frames at the same time.


In
hindsight - everything worked out very well and we are pleased with how
things turned out. It is amazing to me how this one stupid choice to
reduce waste added so much extra effort and work - yet another learning
experience of what not to do! These blunders are painful at the time, but I really do believe they are an important part of the learning process.
I
have also been busy working on several planes - two traditional panel
planes. This first one is 18-1/2" long, infilled with Desert Ironwood
and has a bed angle of 55 degrees. There was some re-design required to
allow for the higher bed angle, but overall, I am very pleased with how
it turned out. Here are a few photos.


The top of the handle has the most amazing bit of color in it. In the sunlight - it looks like it is on fire.


The second plane is a 14-3/4" long, A1 panel plane infilled with Rosewood. It was a lot of fun to work on this plane - it has been some time since building a more traditional panel plane.


It was also great to work with such fine timber.

A little bit of curl in the top of the handle - a rare find in Rosewood.


This project is coming along too... slowly - but coming along. Dare I say I hope to have them done for my birthday at the end of October? Did I just jinx it by saying it? I guess I will find out.
posted by Konrad at
08:52
9 Comments
![]()
9 Comments:
Holy Crap!
You're making a guitar!
Left handed?
I will be attending your first gig with that Les Paul you know?
Storm doors look great. Nice addition. Should help keep the cold out.
Tim
Awesome Planemaker, accomplished woodworker, and you can play guitar? ...that you build yourself.
Now I'm really impressed
What finish did you use on the doors & sidelites? The color on the white oak looks great, panel detail and ebony plug add nice design details. Do you get direct sunlight exposure - do you anticipate having to touch up the finish every season or so?
Hi Ric,
yeah - working on 2 left-handed guitars. It has been a busy summer - all good, but just getting back into the swing of things... and the blog.
cheers,
konrad
Hey Richard,
you are on. I think Ironman is a good first song... Lucas played it for months:)
cheers,
konrad
Hi Chris,
Part of the reason for making the guitars is so I can learn to play. Lessons are all lined up... just gotta finish the instruments now.
cheers,
konrad
Hi Nathan,
I though a lot about the finish. The door faces north with a 12' deep front porch so there is very good sun and weather protection. I used a blend of varnish and oil - P&L 38 and about 1/6 double boiled linseed oil thinned with a bit of mineral spirits. I hope I don't need to touch it up too often - time will tell though.
Cheers,
konrad
Subscribe to Post Comments [Atom]
<< Home